Let’s make your tank the happiest little splash in the house, even when it is filled with teeny, wiggly betta fry. Fry grow fast, and the trick is giving them the right size food at the right time, in clean water, without overfeeding. This guide walks through what to feed from hatching to juvenile stage, plus exactly how to culture infusoria, microworms, and baby brine shrimp.
Before you feed: two rules
1) Match food size to mouth size
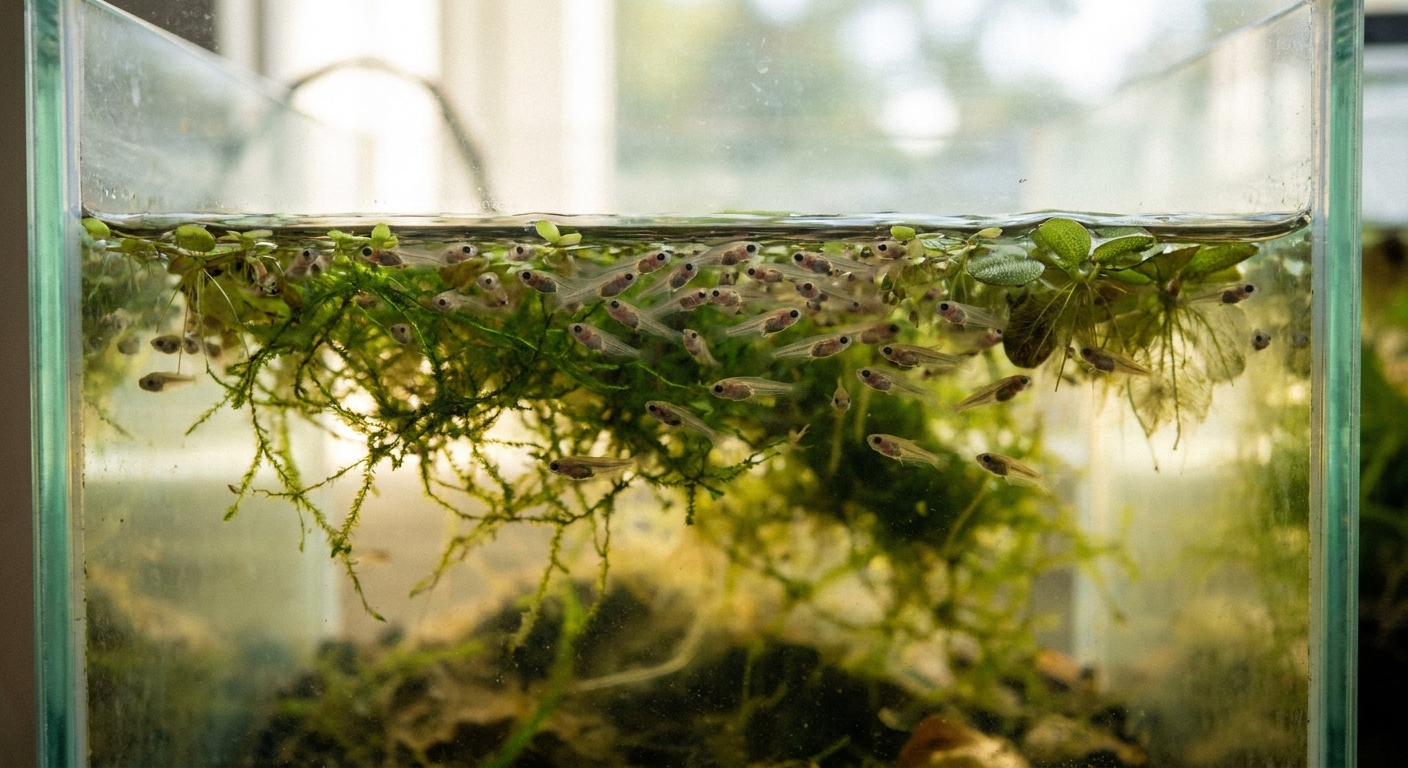
Newly free-swimming fry can only take microscopic foods. If the food is too big, they will ignore it and slowly weaken. That is why infusoria comes first for many spawns, then microworms, then baby brine shrimp.
2) Feed often, keep water spotless
Fry need frequent small meals, but leftover food quickly spoils water. Plan on tiny feedings and gentle maintenance. If you are still setting up the rearing tank basics, these guides help keep the water safe and stable: How to Cycle a New Betta Fish Tank, Betta Tank Cleaning Routine and Water Change Schedule, and How to Prepare Tap Water for a Betta Tank.
Feeding timeline: hatch to juvenile
Every spawn grows at its own pace, and free-swimming timing can shift with temperature and genetics. Many betta spawns go free-swimming around day 2 to 4, so use behavior as your real clock. If they are still hanging and absorbing yolk, do not feed yet.
| Age | What fry are doing | Best foods | How often |
|---|---|---|---|
| Hatch to free-swimming (often days 1 to 4) | Mostly hanging, absorbing yolk | No food yet | Do not feed |
| First days free-swimming (roughly days 3 to 7) | Searching for tiny moving specks | Infusoria for very small fry; baby brine shrimp can start early if fry are big enough to take it; microworms as a bridge once they can swallow them | 3 to 6 tiny feedings daily |
| Week 2 to 4 | Noticeably larger, stronger swimmers | Baby brine shrimp (BBS) as the main staple, plus microworms as backup | 3 to 5 feedings daily |
| Week 4 to 8 | Juvenile shape forming, faster growth spurts | BBS, finely crushed high-quality pellets, finely chopped frozen foods | 2 to 4 feedings daily |
| 8+ weeks (juvenile stage) | More confident eaters, larger mouths | Small pellets, frozen foods, occasional live foods | 2 to 3 feedings daily |
For pellet basics once they are ready, keep this handy: How Much and How Often to Feed a Betta Fish. Juveniles still do better with smaller, more frequent meals than adults.
Male care and when feeding starts
If the male is still with the spawn, most breeders begin feeding once fry are clearly free-swimming and no longer returning to the bubble nest. That is also when many people remove the male, since he may start viewing fry as snacks instead of babies. If you choose to leave him a little longer, watch closely and be ready to pull him at the first sign of chasing or nipping.
Infusoria: first micro-food
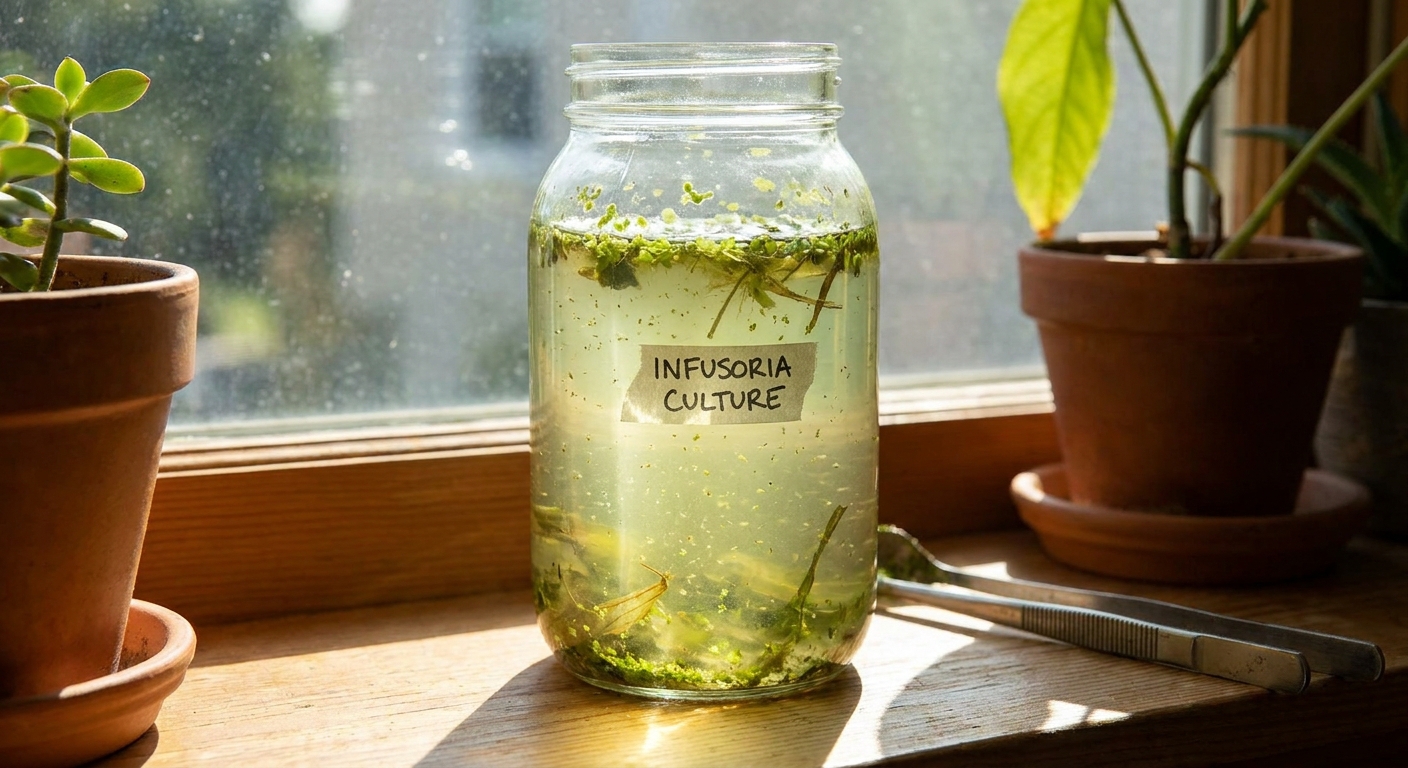
Infusoria is a catch-all term for microscopic organisms (like protozoa and tiny rotifers) that appear in plant-rich water. It is perfect for the earliest free-swimming days when fry are too small for bigger live foods.
Option A: leaf and plant method
This method encourages a bloom of microscopic life by feeding it tiny amounts of decaying plant matter.
- Container: A clean jar or small food-safe container (1 quart or 1 liter is plenty).
- Water: Dechlorinated water, or water taken from an established aquarium.
- Starter: A small pinch of aquarium plant trimmings, or a small piece of clean lettuce or spinach.
Step-by-step
- Fill the container with water.
- Add a small pinch of plant matter. Less is better. Too much turns foul quickly.
- Set it in bright ambient light (near a window, not baking in harsh direct sun).
- Wait 2 to 5 days. The water may turn cloudy, then begin to clear. That cloudy then clearing phase is often when infusoria is booming.
How to harvest and feed
- Use a turkey baster or pipette to pull water from the clearest part of the jar (avoid sucking up rotting plant bits).
- Add a small squirt to the fry tank near where fry are swimming.
- Feed tiny amounts several times a day. The goal is to provide constant micro-specks, not cloud the fry tank.
Safety note
- If the culture smells rotten or sulfur-like, turns slimy, or looks anaerobic, discard it and restart. A healthy culture smells earthy, not nasty.
- To reduce hitchhikers like hydra or planaria, use clean plant trimmings (a quick rinse in dechlorinated water helps) and avoid scooping debris into the fry tank.
Option B: green water support
Green water is suspended algae. Fry do not reliably eat algae as a true first food, but green water can help by supporting the microfauna fry actually hunt (infusoria and other tiny critters). Think of it as a booster for your micro-food chain, not a stand-alone fry diet.
Microworms: easy bridge food
Microworms are tiny nematodes that wriggle enticingly and are easy to culture. They are larger than infusoria, so they are usually best once fry have been free-swimming for a few days and are clearly pecking at micro-food.
What you need
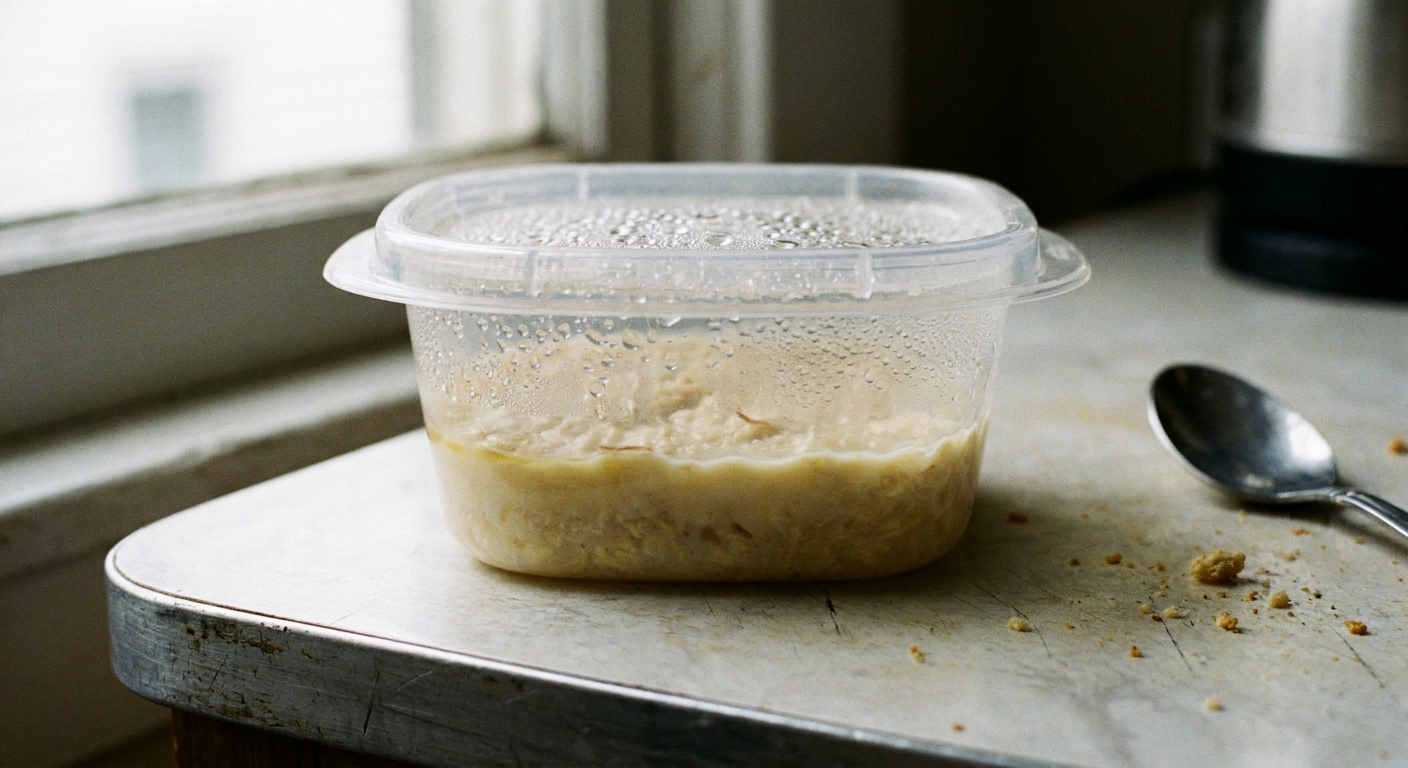
- A shallow plastic container with a lid (deli cup or small food container)
- Oatmeal or instant mashed potatoes (either can work as the culture medium)
- Warm water
- A microworm starter culture (from a trusted fishkeeping source)
- A small piece of sponge or a strip of plastic canvas (optional, helps harvesting)
Step-by-step: oatmeal method
- Mix oatmeal with hot water to make a thick paste. Aim for about 1 to 1.5 cm (half an inch) depth in the container.
- Let it cool to room temperature.
- Add the microworm starter on top and gently spread it.
- Close the lid, but allow a little air exchange. Poke a couple of tiny holes or do not snap it fully airtight.
- Keep at normal room temperature. You should see worms climbing the sides within 2 to 5 days.
How to harvest and feed
- Use a cotton swab or fingertip to wipe worms from the container wall.
- Swish the swab in a small cup of tank water, then use a pipette to add a little to the fry tank.
- Feed small portions. Microworms tend to accumulate on the bottom and can foul water if you dump too much at once, so keep the rearing tank tidy.
Culture care
- Start two cultures: One can crash while the other keeps producing.
- Restart weekly: Make a new container using a small scoop of the old culture as your starter.
- Mold or mites: If you see fuzzy mold, swarms of tiny mites, or the smell turns rotten, discard and restart with a clean container and fresh medium.
Baby brine shrimp: growth rocket
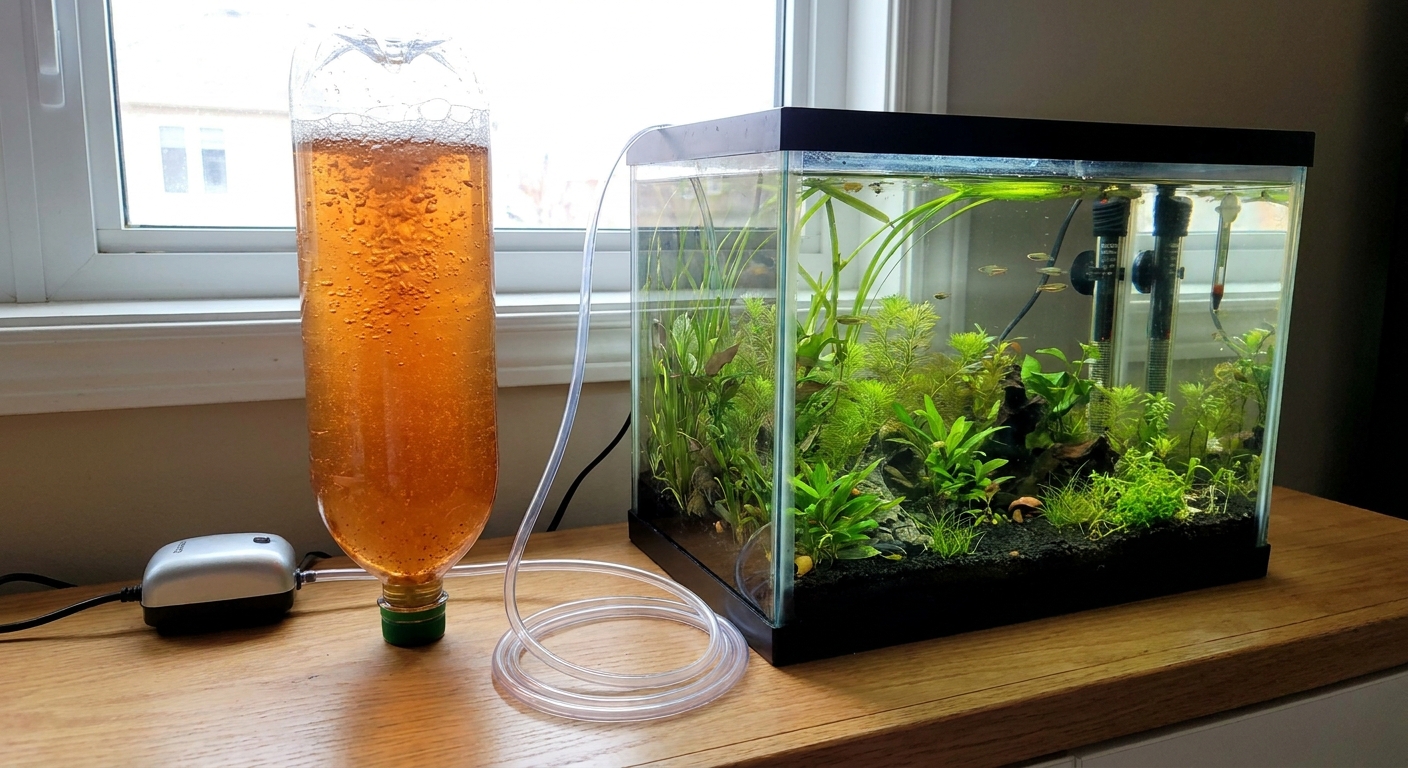
Freshly hatched baby brine shrimp (often called BBS) are a favorite for raising betta fry because they move in the water column, trigger a strong feeding response, and pack serious nutrition for fast growth. Many breeders introduce BBS very early, as soon as fry are large enough to take it.
What you need
- Brine shrimp eggs (cysts)
- A hatching container (a simple inverted bottle hatchery works)
- Aquarium salt or marine salt mix
- Airline tubing and an air pump
- A light source nearby (a small lamp helps attract nauplii for harvesting)
- A fine brine shrimp sieve or very fine netting
Mixing hatch water
A common target is about 25 to 30 ppt salinity (specific gravity roughly 1.018 to 1.022). Salt measurements by spoon vary wildly by brand and scoop size, so treat any “tablespoon recipe” as a starting point, not gospel. If you have a hydrometer or refractometer, use it for consistency. If you do not, pick one simple recipe and keep it the same every time.
Step-by-step hatching
- Fill the hatch container with saltwater.
- Add brine shrimp eggs (start small, you can always hatch more).
- Add vigorous aeration so eggs stay tumbling and oxygenated.
- Keep the hatch warm if possible. Many people aim for roughly 78 to 82 F (26 to 28 C) for faster, steadier hatches.
- Wait about 18 to 36 hours. Hatch time varies with temperature, egg quality, and salinity.
How to harvest (less salt in the fry tank)
- Turn off the air and let the hatchery settle for 5 to 10 minutes.
- Shine a light at the bottom or one side. Baby brine shrimp gather toward light.
- Draw the orange cloud of nauplii from the bottom with airline tubing or a baster.
- Pour through a brine shrimp sieve, then rinse well with dechlorinated fresh water.
- Swish the rinsed nauplii into a small cup of tank water, then feed fry in small doses.
Safety note
- Use dechlorinated water for mixing and rinsing. Chlorine or chloramine can reduce hatch rates and can harm fry if it gets into the rearing tank. If you need a refresher, see How to Prepare Tap Water for a Betta Tank.
How much to feed
- Offer what they can eat in a few minutes, several times per day.
- You will often see round, slightly orange bellies when they are getting enough BBS.
Keep BBS available daily
To avoid gaps, run two hatcheries on a staggered schedule (for example, start one today and one tomorrow) so you always have freshly hatched shrimp ready.
Transitioning to juvenile foods
Once fry look like mini bettas with stronger fins and bigger mouths, it is time to broaden the menu. Live foods can still be the main event, but juveniles can begin accepting prepared foods too.
When to start pellets
- If juveniles consistently chase and eat BBS, they are usually ready to try very small pellets or crumbled pellets.
- Introduce slowly, and keep feeding BBS so nobody goes hungry while learning.
Best ways to offer prepared foods
- Crush pellets into dust and tiny crumbs between clean fingers or with a spoon.
- Pre-soak briefly in tank water so crumbs do not float away or expand inside tiny bellies.
- Remove uneaten bits promptly to protect water quality.
If you want to compare common prepared options for later, see Pellets vs Flakes for Betta Fish. For juveniles, small pellets or fine crumbles are usually easier to portion than flakes.
Daily routine and water changes
Here is a simple rhythm that works well for many fry setups. Adjust based on tank size, filtration, and how heavily you are feeding.
Example day (week 1 to 3)
- Morning: Infusoria (if fry are tiny) or BBS (if they can take it)
- Late morning: Microworms or BBS
- Afternoon: BBS
- Evening: BBS, lighter feeding
Water-change targets (practical and cautious)
- Heavily fed fry tanks often do well with small, frequent changes, such as 10 to 20 percent daily or every other day.
- Match temperature and use dechlorinated water.
- If you can, test for ammonia and nitrite and let the results guide you. Fry do not tolerate water quality swings well.
Clean-up habits that help
- Use a turkey baster: Spot-remove uneaten worms, dead nauplii, and debris from the bottom.
- Gentle filtration: Keep flow low so fry are not tossed around. Sponge filters are common for fry tanks.
Need help balancing feeding with maintenance? See Betta Tank Cleaning Routine and Water Change Schedule.
Troubleshooting
My fry ignore the food
- Check timing: If they are not free-swimming yet, do not feed.
- Go smaller: Start with infusoria if fry are tiny, then move up to microworms or BBS when they can swallow it.
- Use movement: Live foods that wiggle in the water column are easiest for them to recognize.
The water turns cloudy fast
- Feed smaller portions.
- Remove leftovers with a baster.
- Increase the frequency of small water changes.
My microworm culture smells bad or gets moldy
- Restart with a thinner, fresh medium and a clean container.
- Keep cultures out of hot direct sun.
- Run two cultures so one is always healthy.
My brine shrimp are not hatching
- Make sure aeration is strong enough to keep eggs moving.
- Keep salinity and temperature consistent.
- Make sure any water used is dechlorinated.
- Try a fresh batch of eggs if older eggs were exposed to humidity.
Quick FAQ
Can betta fry live on infusoria alone?
Infusoria is a great starter, but fry typically grow much better when you transition to richer foods like microworms and especially baby brine shrimp as soon as they can handle them.
How do I know if fry are getting enough food?
Look for consistent activity, steady growth, and gently rounded bellies after feeding. With baby brine shrimp, you may see a faint orange tint in the belly.
Do I need live foods to raise betta fry?
Live foods make early feeding much easier because they move and stay bite-sized. Many keepers rely on infusoria, microworms, and baby brine shrimp for the first critical weeks, then gradually introduce prepared foods.
A sweet wrap-up
Raising betta fry is all about timing and tiny portions: micro-foods for the earliest free-swimming days, then microworms and baby brine shrimp for strong, steady growth into the juvenile stage. Keep meals small, keep water clean, and you will be cheering on a whole school of healthy little wigglers in no time.